Building a home gym in the time of COVID
March 09, 2021
Before COVID-19 went into full swing, I had been doing the Starting Strength program on and off for a couple years. But, I was at a plateau with my progress. By March 2020, I was doing:
| Exercise | Weight | Sets x Reps |
|---|---|---|
| Squat | 245lbs | 3x5 |
| Bench Press | 135lbs | 3x5 |
| Overhead Press | 100lbs | 3x5 |
| Deadlift | 285lbs | 1x5 |
| Power Cleans | 135lbs | 5x3 |
After COVID-19 happened, the endless pandemic, gym closures, etc. killed both my motivation and my gains. Then, suddenly in December my legs were literally growing restless at how quickly my gains were leaving my body. It was my body telling me it was time to lift again. But all the gyms were closed, or ask you to lift with a mask (hard to properly perform the Valsalva manuveur). The only solution was to build a home gym in the basement.
- The Setup
- The Rack
- The Bench
- The Bar
- The Plates
- The Floor
- Accessories
- The Importance of American-Made
- Parting Thoughts
The Setup
Building my home gym came with some problems:
- The ceiling only has 87” of clearance, and I’m 6’3”, so overhead press and chin ups would be an adventure to say the least.
- Fitness equipment is getting bought faster than it can be made. If you have diamond hands, you will hold onto cast iron barbell plates, not $GME.
So given those constraints, here’s what I ended up getting:
| Item | Price | Notes |
|---|---|---|
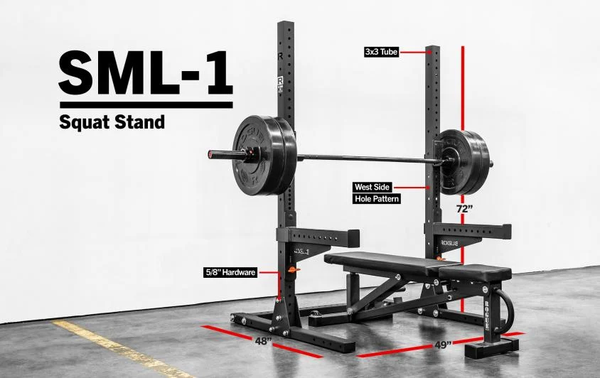
| SML-1 Rogue 70” Monster Lite Squat Stand | $365.00 | Shortest squat stand on Rogue |
| SAML-24 Monster Lite Safety Spotter Arms (Pair) | $162.75 | Additional add-on to the SML-1 stand |
| Rogue Flat Utility Bench 2.0 | $179.50 | The adjustable bench is about $300 more |
| 20kg American Barbell Training Bar | $325.00 | No center knurl |
| Eleiko IWF Weightlifting Rubber Coated Competition Discs (2 * 1kg) | $48.00 | |
| Eleiko IWF Weightlifting Friction Grip Competition Plates (4 * 2kg) | $136.00 | |
| Eleiko IWF Weightlifting Rubber Coated Competition Discs (2 * 5kg) | $92.00 | |
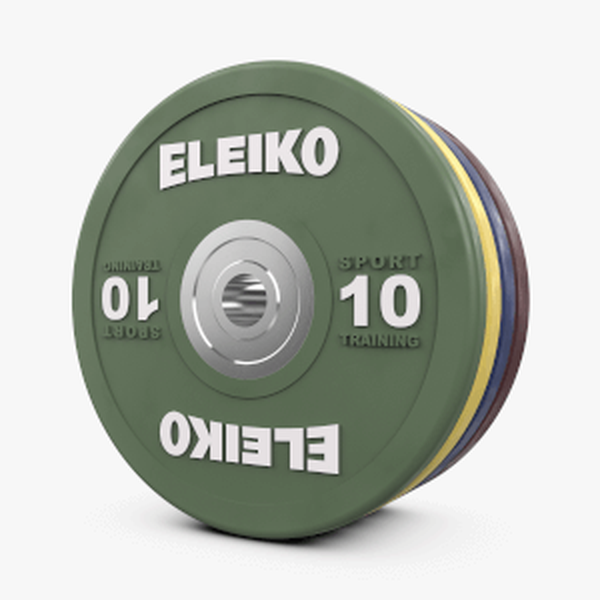
| Eleiko Sport Training Discs (2 * 10kg) | $254.00 | |
| Eleiko Sport Training Discs (4 * 20kg) | $772.00 | |
| OSO Mighty Collars | $27.50 | |
| American Floor Mats Fit-Lock Rubber Tiles | $291.40 | Get the 8’x8’ 16 tile setup |
| Total | $2653.15 |
For the rest of the post, I’ll explain how I picked these items, and some alternatives you might consider based on your own situation.
The Rack
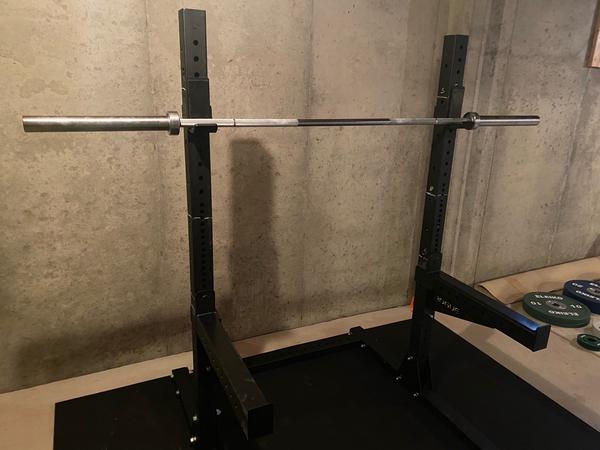
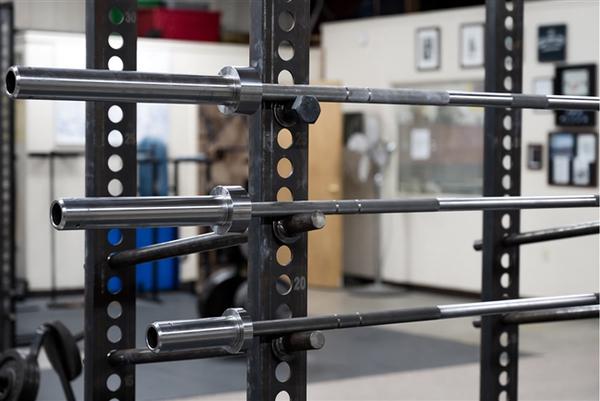
Rather than going for a power rack, I went for a squat stand for two reasons. First, I needed something that could actually fit height-wise. Second, power racks are an order of magnitude more expensive. Most good power racks usually measure around 90” tall, and often cost around $1000 or more. The SML-1 Rogue Squat Stand on the other hand, only measured in at 70” tall, and costed me $527.75 (with safety arms) at the time of purchase. So far, I have had zero problems with the stand. It’s stable even though it is not bolted to the floor. If you want some extra stability, just push the base up against a wall.
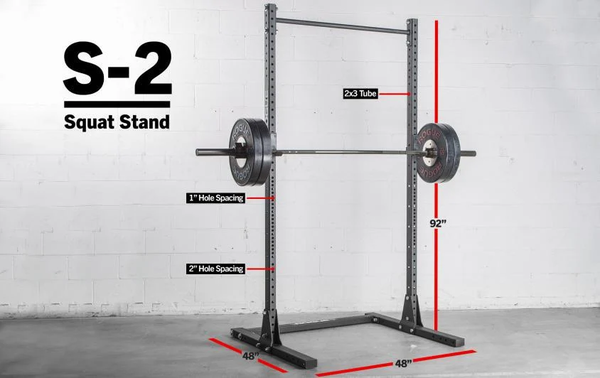
However, if you do have the ceiling clearance, and the budget, you might consider a power rack. Some of the ones I was considering are the Starting Strength Power Rack from Texas Strength Systems, and the RML-390C Power Rack from Rogue. For me, the primary benefit of these racks over the squat stand is the pull-up bar, which is certainly not worth the extra $500 or so. You might as well get a taller squat stand that can handle a pull-up bar, such as the Rogue S-2 Squat Stand.

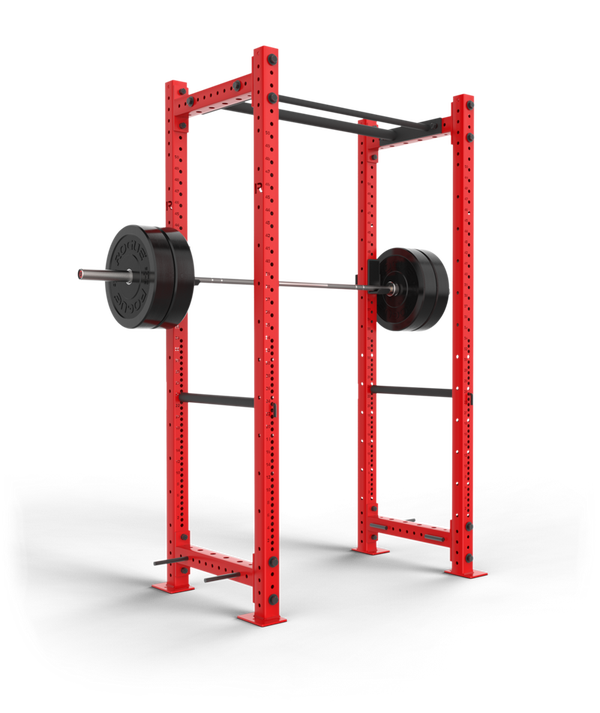
The SML-1 Squat Stand comes with a compatible set of safety arms for an additional price. Making sure you get these. Having safety arms is an absolute must. If you’re going to squat or bench press safely, you need a way to get the weight off your body if you get pinned.
The Bench
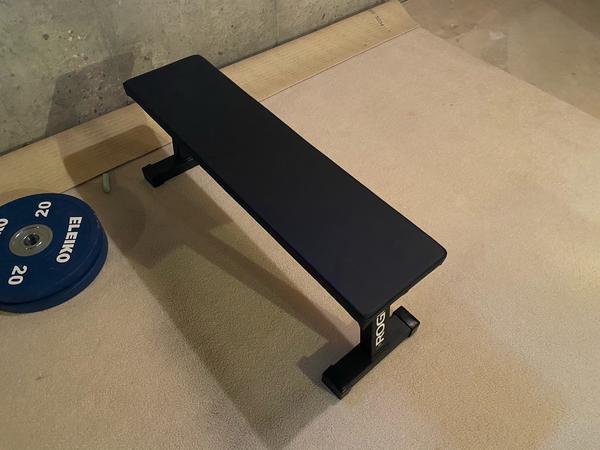
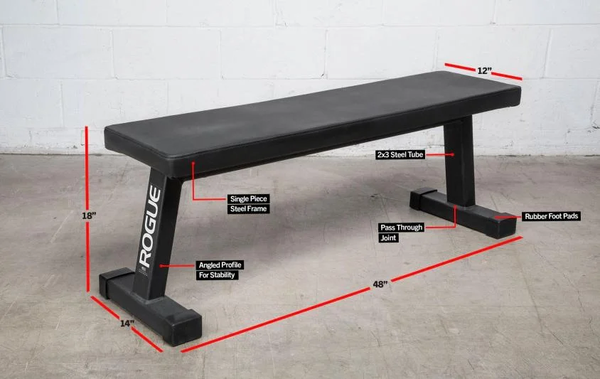
I just bought the Flat Utility Bench from Rogue, since I was getting their squat stand anyways. It’s a fairly standard bench, and all the joins are welded (not bolted). A bench has to be able to hold up the weight of your body, plus whatever you are benching. So, having a properly welded bench rather than one assembled in parts is important. The Flat Utility Bench is firm to provide a stable base, but just soft enough to be comfortable while benching.
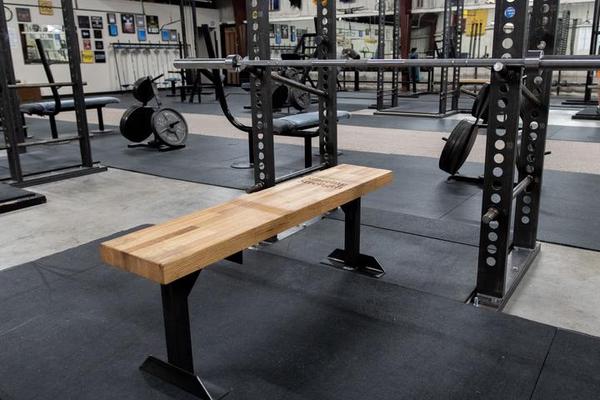
You could look into an adjustable bench if you want to do seated shoulder presses. But, adjustable benches, such as Rogue’s tend to be quite a bit more expensive. Plus, you do not need it for the main compound lifts. If you want to try something a little different, or you want an even firmer bench, you can try the Starting Strength Bench from Texas Strength System. Rather than a normal cushion on top, it has a solid oak top.
The Bar
This is the most important piece of equipment. Having a low-quality bar is a detriment to your training as well as being unsafe. A poorly constructed bar will be unable to hold a large amount of weight, be more prone to bending over time, and be more likely to break catastrophically. It will likely also not spin as freely. Meaning, as you are lifting, the rotational forces of the plates will put strain on your joints, causing wrist and elbow pain.
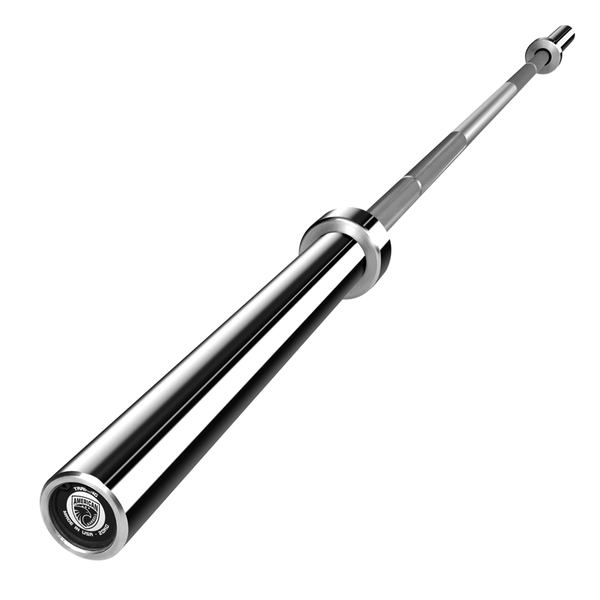
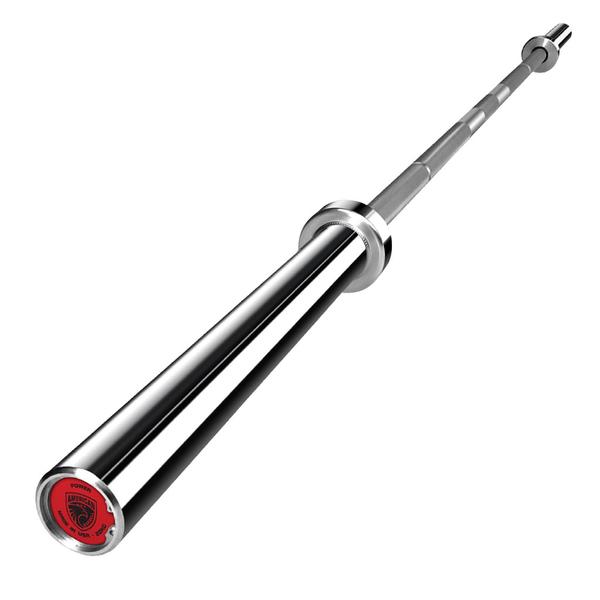
I was originally planning on purchasing the Rogue Ohio Bar, but it was sold out at the time. Instead, I purhcased the American Barbell 20kg Training Bar. The knurling on it could be a tad bit stronger, but overall I have had no grip issues in any of my exercises.
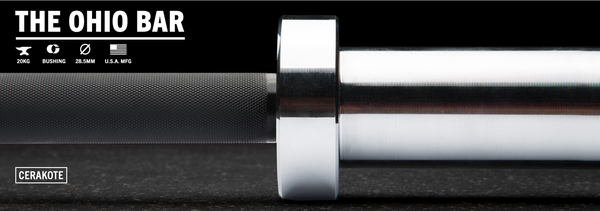
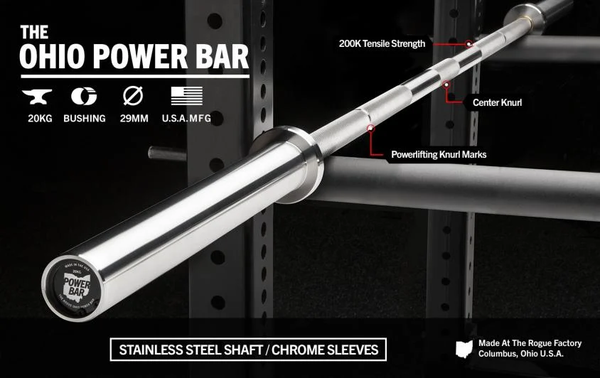
One important thing to note is that the Training Bar does not have a center knurl. I have never used a center knurl, but as my squat begins to increase, I certainly see the benefits of having a center knurl. When you are doing a really heavy squat, you will want to make sure that the bar is extra secure against your back. If I was redoing these purchases again, I would instead buy the Rogue Ohio Power Bar, the American Barbell Grizzly Power Bar, or the Starting Strength 20kg Bar from Capps Welding.
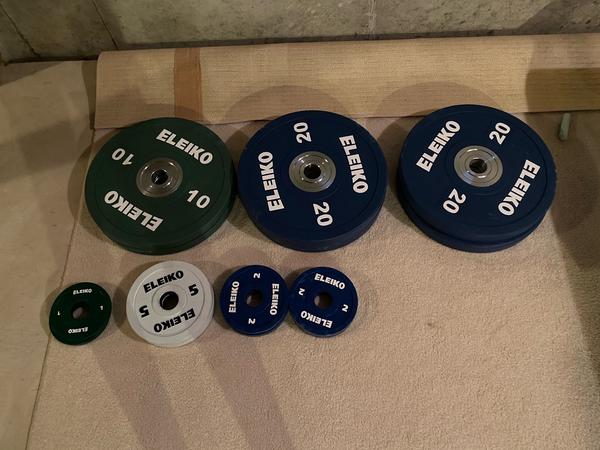
The Plates
I purhcased the weight plates from Eleiko, because all of the cast iron plates around the country were sold out, except for CAP barbell plates on Amazon. But, those are cheap, and will make you regret your purchase. It’s important to have plates that are well-made and properly calibrated. If they are well-made, they will not chip or rust. If they are properly calibrated, they will weigh close to what the label says. That is important, because lifting uneven weights can lead muscle imbalances, or possibly injury.
Eleiko officially provides the plates for the International Weightlifting Federation, so they are a trusted brand, but you pay a premium for that quality. For your home gym, you can definitely settle for something less premium, but my options were limited at the time. By the time you end up buying plates, you would probably be well served by the York barbell plates sold by Rogue Fitness.

Regardless of where you buy, make sure the plates are calibrated, or made using modern casting techniques. The other thing to keep in mind is the mix of plates you want to purchase. Below, I will show you the mix of plates you will want based on the weight progression you want. The first progression is 5lbs using pound plates as recommended by Starting Strength. The second is 2.5kg using kilogram plates. And, the third is 2kg using kilogram plates. Once you go past 90lbs or 40kg, you just need to keep buying more of the heaviest type of plates (45lbs or 20kg).
5lbs Progression
| 2.5lb plates | 5lb plates | 10lb plates | 25lb plates | 45lb plates | Total (lb) |
|---|---|---|---|---|---|
| 2 | 5 | ||||
| 2 | 10 | ||||
| 2 | 2 | 15 | |||
| 2 | 20 | ||||
| 2 | 2 | 25 | |||
| 2 | 2 | 30 | |||
| 2 | 2 | 2 | 35 | ||
| 4 | 40 | ||||
| 2 | 4 | 45 | |||
| 2 | 50 | ||||
| 2 | 2 | 55 | |||
| 2 | 2 | 60 | |||
| 2 | 2 | 2 | 65 | ||
| 2 | 2 | 70 | |||
| 2 | 2 | 2 | 75 | ||
| 2 | 2 | 2 | 80 | ||
| 2 | 2 | 2 | 2 | 85 | |
| 2 | 90 |
This is a starting setup that will keep you busy for a few months if you’re just starting out:
| # of plates x weight |
|---|
| 2 x 2.5lbs |
| 2 x 5lbs |
| 4 x 10lbs |
| 2 x 25lbs |
| 4 x 45lbs |
| Total: 285 |
2.5kg Progression
| 1.25kg plates | 2.5kg plates | 5kg plates | 10kg plates | 20kg plates | Total (kg) |
|---|---|---|---|---|---|
| 2 | 2.5 | ||||
| 2 | 5 | ||||
| 2 | 2 | 7.5 | |||
| 2 | 10 | ||||
| 2 | 2 | 12.5 | |||
| 2 | 2 | 15 | |||
| 2 | 2 | 2 | 17.5 | ||
| 2 | 20 | ||||
| 2 | 2 | 22.5 | |||
| 2 | 2 | 25 | |||
| 2 | 2 | 2 | 27.5 | ||
| 2 | 2 | 30 | |||
| 2 | 2 | 2 | 32.5 | ||
| 2 | 2 | 2 | 35 | ||
| 2 | 2 | 2 | 2 | 37.5 | |
| 2 | 40 |
| # of plates x weight |
|---|
| 2 x 1.25kg |
| 2 x 2.5kg |
| 2 x 5kg |
| 2 x 10kg |
| 4 x 20kg |
| Total: 117.5 |
2kg Progression
This is the progression I ended up using, just based on the plates that were actually available for sale. In the grand scheme of things, it is probably not that much different than 2.5kg, although the progression is slightly slower.
| 1kg plates | 2kg plates | 5kg plates | 10kg plates | 20kg plates | Total (kg) |
|---|---|---|---|---|---|
| 2 | 2 | ||||
| 2 | 4 | ||||
| 2 | 2 | 6 | |||
| 4 | 8 | ||||
| 2 | 10 | ||||
| 2 | 2 | 12 | |||
| 2 | 2 | 14 | |||
| 2 | 2 | 2 | 16 | ||
| 4 | 2 | 18 | |||
| 2 | 20 | ||||
| 2 | 2 | 22 | |||
| 2 | 2 | 24 | |||
| 2 | 2 | 2 | 26 | ||
| 4 | 2 | 28 | |||
| 2 | 2 | 30 | |||
| 2 | 2 | 2 | 32 | ||
| 2 | 2 | 2 | 34 | ||
| 2 | 2 | 2 | 2 | 36 | |
| 4 | 2 | 2 | 38 | ||
| 2 | 40 |
| # of plates x weight |
|---|
| 2 x 1kg |
| 4 x 2kg |
| 2 x 5kg |
| 2 x 10kg |
| 4 x 20kg |
| Total: 120 |
Collars
You will probably also want some collars to ensure that your weights do not slide around while you are lifting. For the most part, the Eleiko plates have minimal movement on my bar, but I like using the collars for extra security, and have no complaints about the OSO Mighty Collars.
The Floor
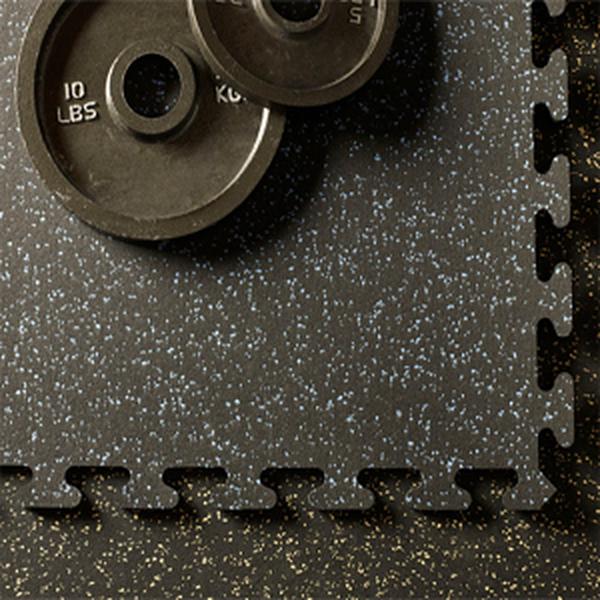
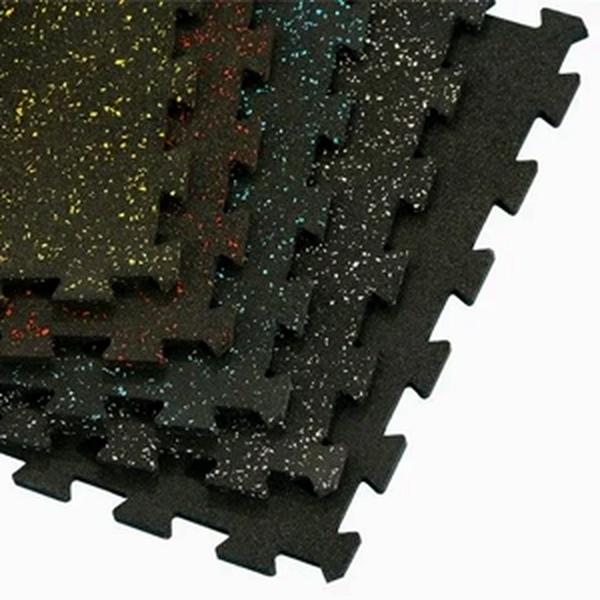
Most likely you’re setting up inside your basement or garage. You probably do not want your floor ruined by dropping heavy weights on them over and over again. To protect your floors, you need to buy some proper mats to absorb the weight. I went with the Fit-Lock Rubber Tiles from American Floor Mats. Make sure you buy enough tiles to cover the entire area you will be using. I find that a 8’x8’ setup works well. That means four corner tiles, eight edge tiles, and four center tiles. If I were buying these all over again, I might opt instead for the Warrior Gym Tiles. That way I would have no reservations about hitting the floor with a heavy deadlift.
Accessories
There are some minor accessories to your gym that are not absolutely necessary, but may make your strength experience better. I am just going to briefly touch on some of these.
Chalk
As you work out, and especially lifting more weight, you are going to start accumulating sweat on your hands. All that sweat is going to eventually affect your grip. So, I like using chalk to make sure my hands are dry, and my grip is sure. Rogue sells a whole box for quite a low price. It is more than enough to last you a long time. I am sure you can also find it on many other websites and stores.
A Belt
A good weightlifting belt will help you maintain a tight torso while you lift. As you lift more and more weight, it becomes more difficult to stay tight during your squat. I found the Rogue Ohio Lifting Belt to be adequate. However, four inches on a belt feels a bit excessive. It can pretty much cover the distance between the bottom of my ribcage to the top of my pelvis. At times it can be uncomfortable at the bottom of my squat. I would recommend getting a three inch belt instead, such as the 3” Ohio belt.
Shoes
I have the Nike Romaleos 2s, which have since been discontinued by Nike. I like them quite a bit, and find that they are stable, well constructed, and comfortable. You can however, probably still find some in clearance sales, or eBay. Nike currently sells the Romaleos 4s.
The Importance of American-Made
You may have noticed that I have recommended American-made products where possible. Rogue manufactures the vast majority of their equipment in the United States, as do American Barbell, Capps Welding, Texas Strength Systems, and Eleiko. I am not sure about American Floor Mats, but if someone knows or has a recommendation for American-made floor mats, please let me know.
American-made products do tend to be more expensive than something you can pick up at Walmart or a big sporting goods store. But, in addition to the simple fact that you get what you pay for, I think it is important to care about where your products are made. If the American consumer does not care where their products are made, then neither do the companies that make them. That means fewer jobs and opportunities for your fellow Americans. If you are a non-American reading this, I would say the logic should apply to your country as well.
Parting Thoughts
If you do not necessarily like the products I have recommended, then you should definitely make sure you understand how to distinguish quality equipment from garbage. An excellent starting point is the video from Starting Strength Radio where Mark Rippetoe explains what to look for.
Let me know what you think about this article by leaving a comment below, reaching out to me on Twitter or sending me an email at pkukkapalli@gmail.com